

View an agent's actions and tools while handling a contact in the new media player
IMPORTANT The information on this page is about the Desktop panel in the new media player. For information about the Desktop panel in the classic media player, go here: View agent's actions and tools while handling a contact in the classic media player.
How do I know which version of the media player I have?
If you see the Return to classic button in the upper-right corner of the page, you are in the new media player, and the information below applies to you.
If you see the Switch to new media player button, or if you don't see either of these buttons, you are in the classic media player. Go here for information about the classic media player: Play contacts in the classic media player.
The Desktop panel summarizes the actions that agents took on their phones and computers. This information lets you identify and analyze decisions that affected their handling of the contact. The panel contains two bars: one for the agent's actions (on the left) and one for the applications that the agent used (on the right). Examples of actions are "On Hold" or "After Call Work." Examples of applications are "Salesforce" or "Microsoft Excel."

Prerequisites
- Your organization has one of the following licenses:
- Analytics Essentials
- Analytics Enterprise
- Analytics Enterprise Plus
- Desktop Analytics
- Your organization does not integrate with Amazon Connect, Cisco Webex Contact Center, or Five9. If your organization uses these systems, the Desktop panel appears but is blank.
- You have the View Contacts and View Desktop Analytics permissions.
- The contact is either an audio call with a screen recording or a screen-only recording.
- For an application or website to appear as Not Approved, it must be assigned the Not Approved status. See Create and manage desktop items.
Page location
Interactions > Double-click a contact > Desktop panel
You can also open the Media Player by clicking a contact ID in one of these locations:
- The Agent Explorer page
- The Performance Management home page
- In Insights
- The AI Tags dashboard
- The Auto QM dashboard
- The Trending Topics dashboard
- The Details pane of an Analytics widget
Procedures
View the agent actions for a contact
The agent contact bar divides the contact into color-coded segments based on the duration of each agent action. The table below defines the different colors that can appear in this bar.
| Color | State Type | Description |
|---|---|---|
|
|
Active |
The agent was talking with the customer. |
|
|
On Hold |
The agent put the customer on hold. NOTE This action is not available for all integrations. |
|
|
After Call Work |
The agent was disconnected from the customer but completing work related to the contact. |


View more information about an agent's action
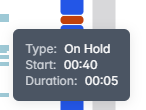
Hover over a segment in the agent contact bar to view the action type, the timestamp in the contact where it occurred, and its duration.
View the tools the agent used during the contact
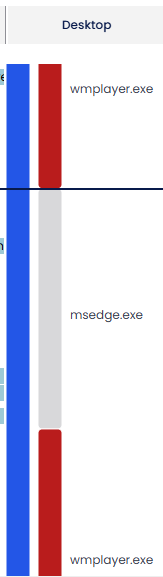
The application usage bar divides the contact into segments based on the applications and websites that the agent accessed throughout.
NOTE The application usage bar shows only applications and websites that were active and in focus during the contact.
Applications are color-coded by their approval status (see Create and manage desktop items).
| Color | Status | Description |
|---|---|---|
|
|
Approved, Ignore, or New |
The agent used an application that they are allowed to, that does not yet have an approval status, or that has been assigned the Ignore status on the Desktop Manager page. |
|
|
Not Approved |
The agent used an application that they are not allowed to. |


View more information about an application or website
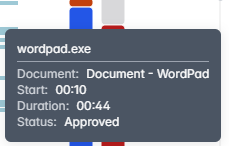
Hover over a segment in the application usage bar to view the item name, the timestamp in the contact where the agent accessed it, how long the agent had the item in focus, and the item's status.
Skip to a specific spot in the contact
- Click a segment to move to it. The AI transcription panel, Time panel, Audio panel, AI sentiment panel, Phrase hits panel, and audio timestamp (next to the Play button) move to the part of the contact that matches the beginning of the segment.
-
(Optional) To view more detail, click the Zoom in icon. The name of each app or website appears next to its segment. Click the Zoom Out icon to return to the original level of detail.

Related topics
- Monitor agents’ focus and activity—View the apps and websites an agent used on a specific date, including when they were not on a call.
- Play contacts with the new media player
- View agent's actions and tools while handling a contact in the classic media player