

Bookmark views of a dashboard
When you open a dashboard, you can create bookmarks to capture specific views of your interests. By doing this, you can quickly return to the data that's relevant to you.
EXAMPLE You create a bookmark for a dashboard with a specific filter setting that differs from the original published dashboard.
Prerequisites
-
You have the Insights Reader license.
- The dashboard you want to bookmark is published.
Page location
Insights > Dashboards > Click a dashboard
Procedures
Create a bookmark for a dashboard
-
Configure the dashboard to exactly the view you want.
EXAMPLE You filter to the team that interests you and select a specific date range using a sheet control on the dashboard.
-
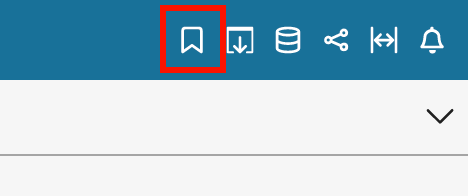
Click the Bookmark icon (upper-right corner of the page). The Bookmarks panel opens.

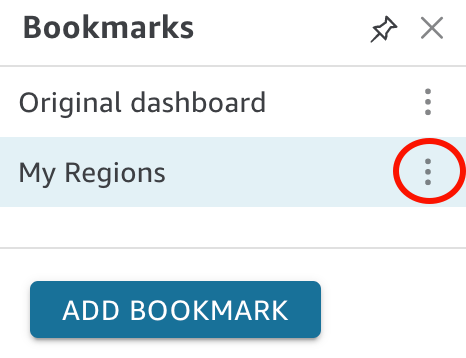
- Click Add Bookmark. The Add a bookmark pane opens.
- Enter a name for the bookmark.
-
Click Save. The dashboard name changes to the bookmark name (at top left).

Return to the original dashboard
- Click the Bookmark icon (upper-right corner of the page). The Bookmarks panel opens.
- Click Original dashboard.
Update a bookmark
At any time, you can change a bookmark dashboard view and update the bookmark to always reflect those changes.
- Open the published dashboard and make needed changes to the filters or parameters, or select a sheet.
-
Click the Bookmark icon (upper-right corner of the page). The Bookmarks pane opens.

-
Click the context menu (the three vertical dots) for the bookmark that you want to update, and then select Update. A confirmation message appears.

Rename a bookmark
-
Click the Bookmark icon (upper-right corner of the page). The Bookmarks pane opens.
-
Click the context menu (the three vertical dots) for the bookmark that you want to rename, and then select Rename. The Rename bookmark pane opens.

- Enter a name for the bookmark.
- Click Save.
Set a bookmark as your default view of the dashboard
By default, when you update a dashboard, Insights remembers those changes and keeps them after you close the dashboard. This way, you can pick up where you left off when you open the dashboard again. You can set a bookmark as the default view of a dashboard instead. If you do, anytime that you open the dashboard, you see the bookmarked view, regardless of the changes you made during your last session. This doesn't affect anyone else's view of the dashboard.
-
Click the Bookmark icon (upper-right corner of the page). The Bookmarks pane opens.

-
Click the context menu (the three vertical dots) for the bookmark that you want to set as your default view, and then select Set as default.

Share a bookmark with another dashboard subscriber
After you create a bookmark, you can share a link to the view with others who have permission to view the dashboard. They can then save that view as their own bookmark.
-
Click the Bookmark icon (upper-right corner of the page). The Bookmarks pane opens.

- Select the bookmark that you want to share so that the dashboard updates to that view.
- Click the Share icon (upper-right corner of the page), and then select Share this view. The Share using a link window opens.
-
Copy the link in the window and paste it in an email or chat message to share it with others. The person who receives the link can then save the view as their own bookmark. For more information about sharing views of a dashboard, see Sharing your view of an Insights dashboard.

Delete a bookmark
-
Click the Bookmark icon (upper-right corner of the page). The Bookmarks pane opens.

-
Click the context menu (the three vertical dots) for the bookmark that you want to delete, and then select Delete. The Delete Bookmark window opens.
- Click Yes, Delete Bookmark.
Related topics