

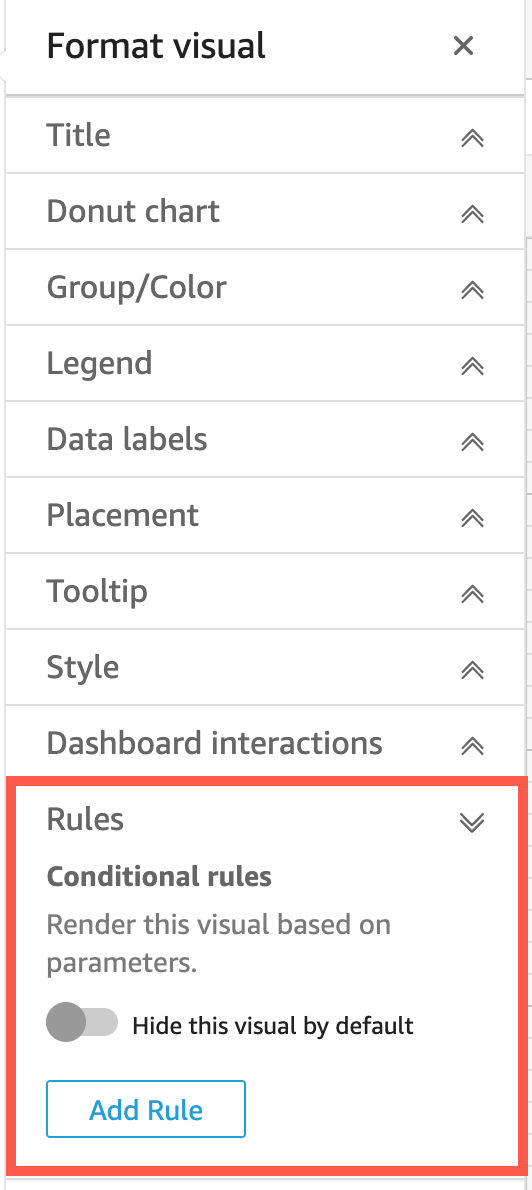
Conditional rules
This feature is currently available with the free-form layout. You can use conditional rules to show or hide visuals when specific conditions are met. This is useful when you have multiple versions of the same visual overlapped with each other and want the dashboard viewer to see a version that best represents the parameter value they select.
Conditional rules use parameters and parameter controls to show or hide visuals. Parameters are named variables that can transfer a value for use by an action or an object. This feature supports string and number parameters. To make the parameters accessible to the dashboard viewer, you add a parameter control. A parameter control allows users to choose a value to use in a predefined filter or URL action. For more information about parameters and parameter controls, see Parameters in Insights.
In the Rules section of the Format menu, you can choose to hide a visual by default. This is useful if you want the viewer to only see visuals based on specific conditions.
Hide a visual by default
-
On the QuickStart start page, click Analyses, and then select the analysis that you want to customize.
-
Select the visual that you want to add a rule to.
-
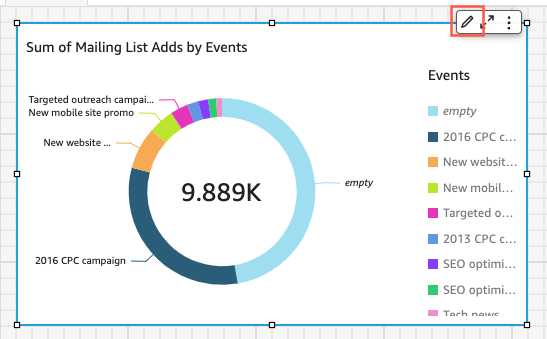
In the upper-right menu, click the Format icon.
-
In the Format menu, click Rules.
-
In the Rules pane, select Hide this visual by default.
Hidden visuals appear fully hidden in a viewing dashboard. In the Analyses pane, hidden visuals are visible with the message Hidden based on rule. With this display, you can see where all of a dashboard's visuals are located.
NOTE You cannot create conditional rules which hide visuals that are already hidden by default or that show visuals that already appear by default. If you change the default appearance of a visual, existing rules that contradict the new default appearance are disabled.
When you set up a conditional rule, you create a conditional statement that shows or hides a visual when a specific condition is met. If you want to create a conditional rule that makes a hidden visual appear, select Hide this visual by default in the Rules pane of the Format menu.
NOTE Before you begin, you must make a parameter and a corresponding parameter control to base your new conditional rule on. The supported parameters are string parameters and number parameters. For more information about parameters and parameter controls, see Parameters in Insights.
Set a conditional rule
-
Click Analyses and then select the analysis that you want to customize.
-
Select the visual that you want to add a rule to.
-
In the upper-right menu, click Format.
-
In the Format pane, click Rules.
-
Click Add.
-
In the first menu in the Add rule pane, select the parameter you want.
-
In the second menu in the Add rule pane, select the condition that you want. For string parameters, supported conditions are Equals, Starts with, Contains, and Does not equal. For number parameters, supported conditions are Equals, Starts with, Contains, and Does not equal.
-
Enter the value that you want the conditional rule to meet.
NOTE Values are case-sensitive.
-
Click Add rule to apply the new conditional rule to the visual. To cancel the rule, click Cancel. Conditional rules can also be edited and deleted.
Edit a conditional rule
-
In the upper-right menu, click Format.
-
In the Format pane, click Rules.
-
Click the menu icon on the right-hand side of the rule that you want to edit and click Edit.
-
Make the changes that you want and click Save.
Delete a conditional rule
-
In the upper-right menu, click Format.
-
In the Format, click Rules.
-
Click the menu icon on the right-hand side of the rule that you want to edit and click Delete.
After you set up a conditional rule that is connected to a parameter and a parameter control, you can use the parameter control to enable or disable the conditional rules that you have set.
Enable a conditional rule
-
On the QuickStart start page, click Analyses and then select the analysis that you want to customize.
-
On the Controls bar at the top of your workspace, select the drop-down icon.
-
Select the parameter control associated with the conditional rule that you created.
-
Select the value associated with the conditional rule that you created from the parameter's menu. You can also enter the value that you want into the Search value box. Values are case-sensitive.
When you select the correct value, it causes the visual to appear or disappear depending on the rule you set. You can also bring a parameter control to the sheet your visual is on. This is useful when you want a parameter control to be next to the visual it is associated with or when you want to add a conditional rule to the control so it appears only when specific conditions are met.
Bring a parameter control to a sheet
-
On the QuickStart start page, click Analyses and then select the analysis that you want to customize.
-
On the Controls bar at the top of your workspace, select the control that you want to move.
-
At the upper right-hand side of the control, open the Menu options menu.
-
Click Move to sheet.
Move a parameter control back to the Controls bar
-
On your dashboard, select the parameter control that you want to move.
-
On the upper right-hand side of the control, open the Menu options menu.
-
Click Pin to top.