

Are new agents recording today?
With this report, we can make sure that calls received by agents who started in the last two weeks are being recorded properly.
Step 1: Add the Contacts measure
- On the Data Explorer page, click New Report (upper left corner of the page). The blank report page appears.
- Click [measure]. The Select Measure window opens.
- Select Contacts.
-
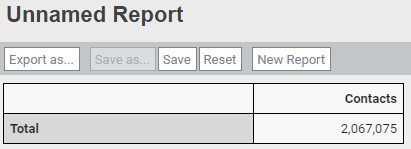
Click Add. The Measure: Contacts window closes, and the basic report appears. At this point, it looks like this:
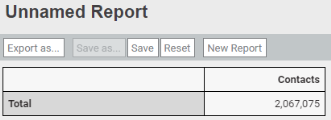
This is the total number of contacts taken since your organization began using Calabrio ONE.
Step 2: Group the contacts by agent
In this step, we start dividing your organization’s total number of contacts into meaningful buckets.
- Click [grouping]. The Select Grouping window opens.
- Select Person.
-
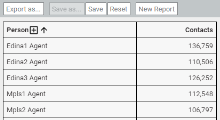
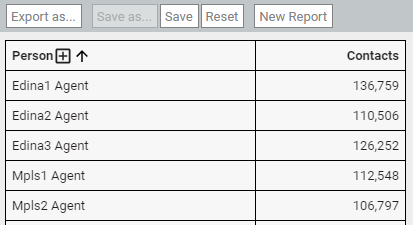
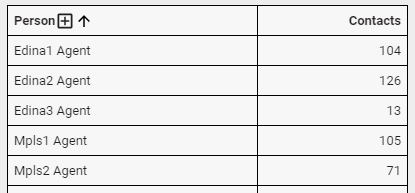
Click Add. Now the report breaks down the total number of contacts by the person who handled them.
Step 3: Limit to today’s calls
Here’s where this report starts to get useful.
- Click [limit]. The Select Filter window opens.
- Click Time (upper right corner of the window).
- Select Contact Start Time.
- In the Period panel, select Contact Start Time.
-
Click Add Filter (the + icon). The Select Period window opens.
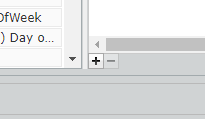
- Select Day of Month.
- Click OK. The Select Period window closes.
-
Select This.
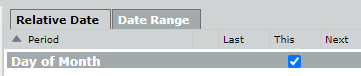
-
Click Add. The Filter: Contact Start Time window closes. Now we see just the contacts handled today.


Step 4: Limit to new agents
Here we restrict the report to only calls handled by agents who started within the last two weeks.
- Click [limit].
- Click Time.
- Select Person Activated Date.
- In the Period panel, select Person Activated Date.
- Click Add Filter (the + icon).
- Select Day of Month.
- Click OK.
- Enter “13” in the Last column.
- Select This.
-
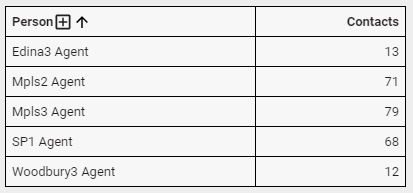
Click Add. Now we have this:

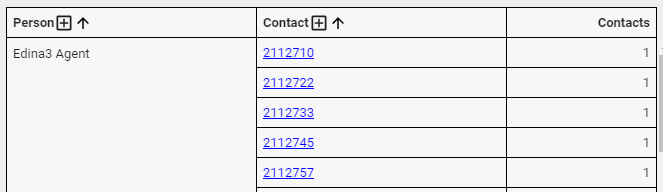
Step 5 (optional): Add a link to each contact
- Click [grouping].
- Select Contact.
-
Click Add. You can click the contact ID to open the contact on the Interactions page. Pretty neat, huh?

Step 6: Name and save the report
- Click Save (upper left corner of the page). The Save Report window opens.
- Enter a name for the report.
- Click Save. The Save Report window closes, and the report name appears in the upper left corner of the page.